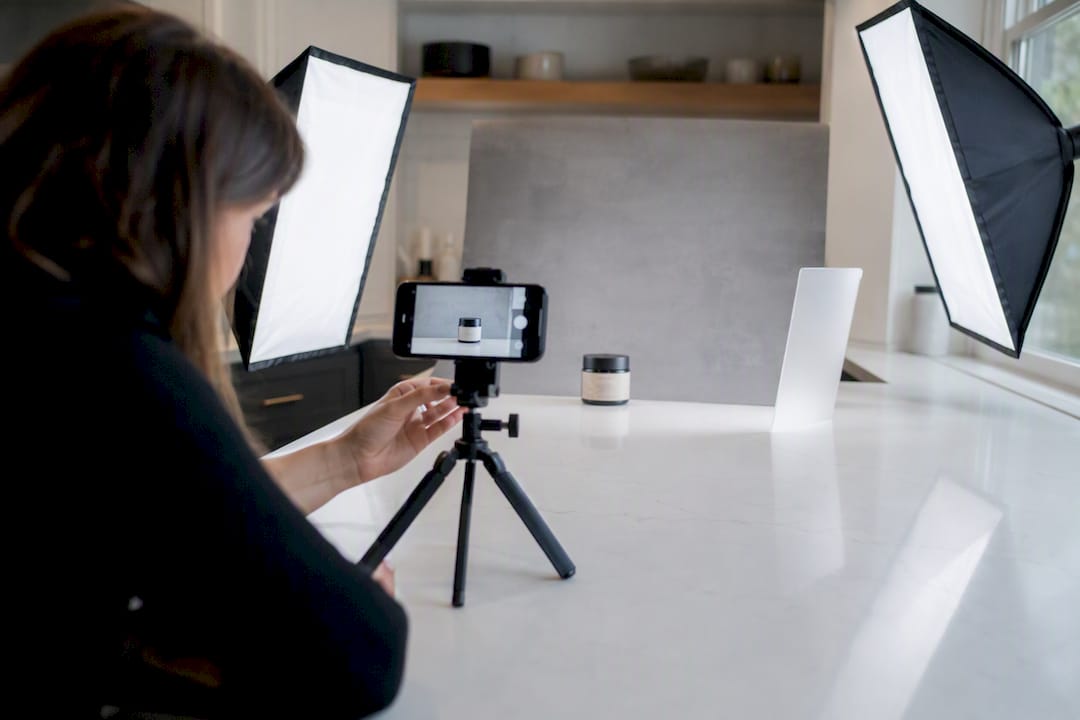
Here’s the whole playbook in one sentence: build a consistent mini-studio, shoot the same six angles every time, then let AI batch-polish the backgrounds and colors while you save your energy for one strong hero shot per item. That’s it. That’s the system.
For tools, you need a short list: SpareDollar for the listing side (drafting, cross-listing, keeping everything consistent across marketplaces), plus PhotoRoom, remove.bg, Canva, and Adobe Photoshop or Lightroom for the actual pixel-pushing. Most background and color edits run anywhere from a couple of seconds to about half a minute per image depending on the tool, so a 20-item photo session can realistically go from camera roll to marketplace-ready in under an hour.
- One consistent setup, shot in the same order every time
- Four to five AI tools, each doing one job well
- A hero image that gets the extra attention; the rest just need to be clean and honest
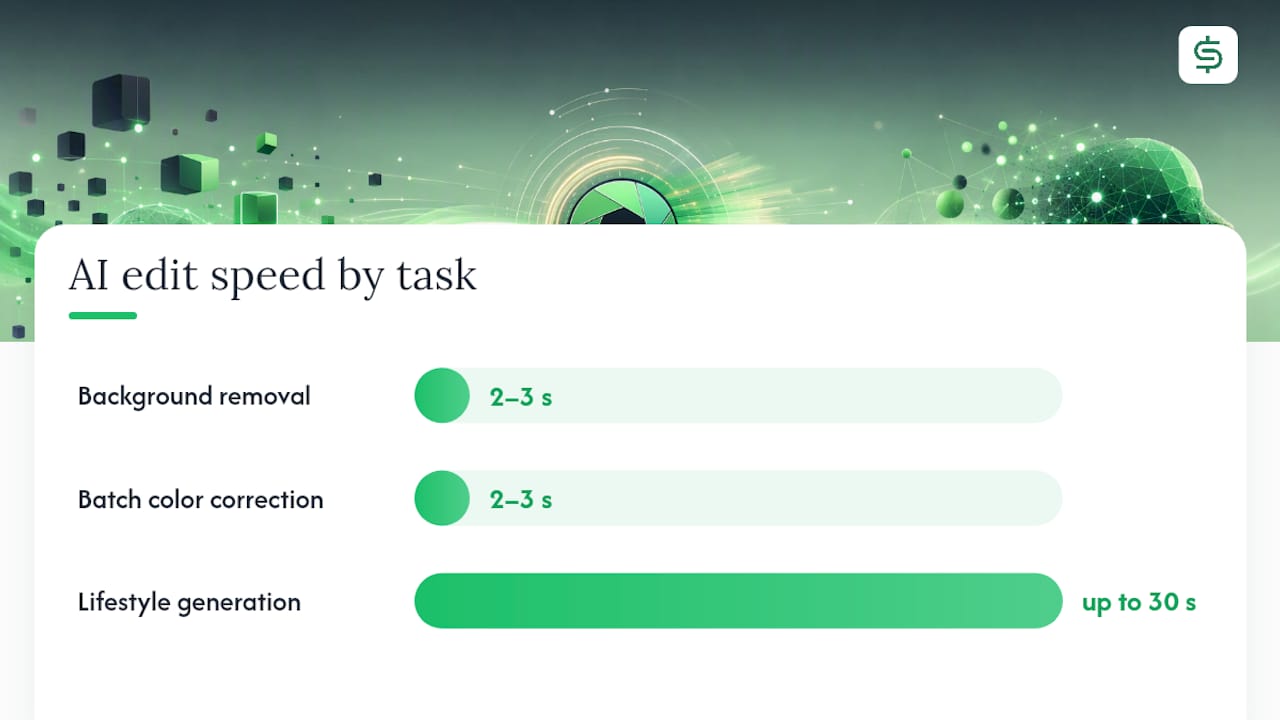
Fast fact: processing times for AI photo tools range from roughly 2 to 30 seconds per image depending on the edit and the service, which is why batching matters more than any single app you pick.
I’m Tomas, and I’ve spent enough time staring at reseller photo grids to notice the pattern: the sellers with the best-looking shops rarely have the best cameras. They just never skip a step.
Key Takeaways
A repeatable capture setup paired with AI batch editing turns a full day of photo work into under an hour without sacrificing the image quality that drives sales.
| Point | Details |
|---|---|
| Build once, reuse always | Set up a consistent backdrop and lighting arrangement you can rebuild in under five minutes each session. |
| Shoot in the same order | Hero, front, back, sides, details, flaws, every single item, no exceptions. |
| Batch the AI edits | Run background removal and color correction across the whole session before touching a single hero image. |
| Save AI generation for the cover shot | Use lifestyle or composite images only for your hero photo, never for condition shots. |
| Let SpareDollar handle the listing side | It keeps drafting, pricing, and cross-marketplace consistency intact after your photos are ready. |
Table of Contents
- Minimal Kit and a Repeatable Studio Setup
- Composition and Styling Rules by Category
- Fast Capture Checklist and File-Naming Workflow
- AI Editing and Batch Processing, Step by Step
- Export Settings for Marketplace Listings
- Keeping AI-Enhanced Photos Honest
- Why Consistency Beats Better Gear Every Time
- Let SpareDollar Handle What Happens After the Photos
- Sources
- FAQ
Minimal Kit and a Repeatable Studio Setup
You don’t need a lightbox tent, a $400 lens, or a garage converted into a studio. You need a phone, a tripod, two light sources, and a backdrop that doesn’t distract from the product.
Here’s what actually earns its spot in the bag:
- A smartphone with a decent rear camera (anything from the last four years works)
- A basic tripod or phone clamp so your angle stays identical shot after shot
- Two continuous soft lights, or one ring light if space is tight
- A plain white or light gray backdrop, either seamless paper or a bedsheet
- A cheap reflector (even white foam board) to fill in shadows
- Microfiber cloth for lens smudges, plus a lint roller for fabric items
Set the backdrop up against a wall, position your item roughly two to three feet in front of it, and place your two lights at 45-degree angles on either side. That angle spread kills harsh shadows without washing out texture, which matters a lot when a buyer is trying to judge fabric condition or scuff marks on shoes.
If you’re deciding between a phone-only setup, a $30 tabletop lightbox, or a full softbox kit, the tradeoff is mostly about space and volume. A reseller-focused gear guide recommends starting with continuous lights and a plain backdrop before spending on anything fancier, and that’s the right order of operations for almost everyone starting out.
Pro Tip: Sketch your setup once on paper: phone on tripod facing the item, item on backdrop, one light left, one light right, reflector low and angled up. Tape that diagram to your wall so you rebuild the same setup in under five minutes every session.
Composition and Styling Rules by Category
Different products need different framing, and treating everything the same is where a lot of listings fall flat. Clothing wants shape and drape. Small goods want scale. Electronics want proof of function.
- Clothing: flat lay or on a mannequin/model for the hero shot, then flat detail shots for tags, fabric, and flaws
- Shoes: a three-quarter angle for the hero, plus a straight-on sole shot to show wear
- Accessories: a close, filled-frame hero shot, since buyers judge these mostly on detail
- Small home goods: show scale with a hand or a common object in at least one frame
- Electronics: hero shot powered on if possible, plus close-ups of ports, screens, and any damage
For your cover photo, weigh on-model or lifestyle context against a clean white-background shot. Clothing and accessories tend to sell faster with a lifestyle or on-body cover image, while electronics and small goods usually convert better with a simple, well-lit studio shot that shows the item exactly as it is.
Lean on basic composition rules: rule of thirds, filled frames, and negative space all apply here, and a photographer’s guide to shooting well anywhere makes the same point in a different way. It’s not about your gear. It’s about where you put the subject and how tightly you crop it.
Pro Tip: Pick one camera height and one background for the entire session, even across different item types. Buyers browsing your shop notice visual rhythm before they notice individual photos, and consistency reads as “professional” faster than any single great shot does.
Fast Capture Checklist and File-Naming Workflow
Shooting fast only works if you shoot in the same order every time. Here’s the sequence:
- Hero shot (the one that’ll be your cover image)
- Front, straight on
- Back, straight on
- Both sides
- Close-up detail shots (fabric, stitching, logo, ports)
- Condition/flaw shots, even the unflattering ones
Before you shoot, run a 30-second prep pass: wipe the lens, lint-roll fabric items, remove any irrelevant tags or stickers, and double-check your background for wrinkles or dust.
Name your files with a system you won’t have to think about later, something like SKU_date_shotnumber (example: BLZR045_0212_03.jpg). That naming convention makes it painless to batch-edit later and match photos back to inventory.
- Shoot 20 to 30 items per session for real time efficiency
- Back up your master files to cloud storage before you start editing anything
AI Editing and Batch Processing, Step by Step
Once you’ve got your raw shots, the AI editing pipeline runs in a specific order, and skipping steps or doing them out of sequence is where most people waste time. Here’s the sequence that works:
- Background removal — Tools like remove.bg and PhotoRoom handle this in a few seconds per image, swapping busy backgrounds for clean white or light gray.
- Color and white-balance correction — Adobe Lightroom’s auto-correct or PhotoRoom’s built-in adjustments fix the yellow or blue cast that indoor lighting almost always introduces.
- Exposure and contrast — a quick auto-adjust in Lightroom or Canva usually gets you 90% of the way there.
- Detail sharpening — a light sharpen pass helps texture and stitching read clearly at thumbnail size.
- Spot repairs — Photoshop’s Generative Fill is genuinely useful here for pulling out a stray thread or background clutter without reshooting.
- One lifestyle or hero image — generate a single styled or contextual version of your best shot using an AI image tool, reserved for your cover photo only.
Processing speed varies a lot by task and tool: some AI edits complete in roughly 2 to 3 seconds, while more complex composite generation can take up to 30 seconds per image. Across a 20-item batch, background removal and color correction alone might take you 15 to 20 minutes total, once you’re used to the tools.
| Task | Speed | Ease of Use | Price | Best For |
|---|---|---|---|---|
| Background removal | Seconds per image | One-click | Free tier, paid for volume | Clean white/gray backgrounds |
| Batch color correction | Seconds per image | One-click presets | Free to low subscription | Fixing indoor lighting casts |
| Lifestyle/composite generation | Up to 30 seconds | Prompt-based | Subscription | Cover photo, on-model context |
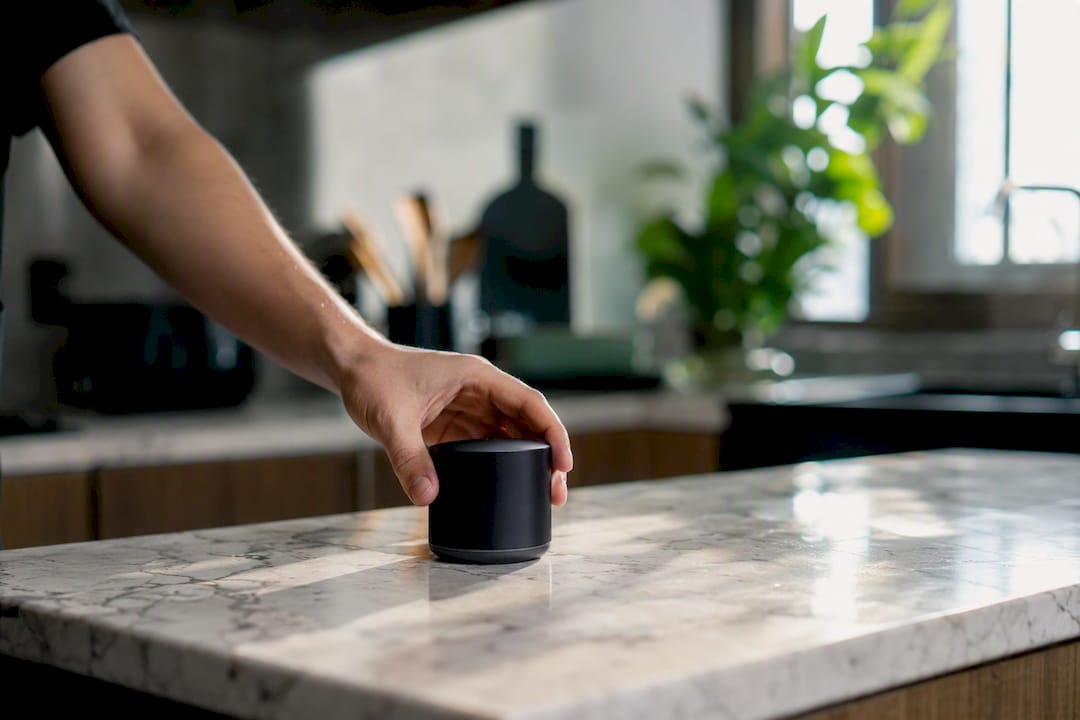
For the lifestyle shot, keep your prompt structure simple and specific: describe the setting, the lighting, and the product’s position, something like “product placed on a wooden cafe table, morning light from the left, minimal styling.” Skip AI generation entirely for condition shots. Buyers need to see the actual item, flaws and all, not a rendered version of it.
Pro Tip: Run background removal and color correction on your whole batch before you touch a single hero image. Batch tasks first, custom work second, always.
Export Settings for Marketplace Listings
Every platform has its own quirks, but a few export rules cover almost all of them. Save your image files as JPEG at 1600 by 1600 pixels minimum, in sRGB color profile, with moderate compression to keep file size reasonable without visible quality loss.
- Use a 1:1 square ratio for your primary photo; most marketplaces crop to square in the grid view anyway
- No watermarks, no borders, no stock photography, especially for used items, since eBay’s photo policy explicitly bans these
- Your thumbnail should show the whole item clearly with good contrast against the background, since that’s what gets the click before anyone reads a word of your description
- Keep one high-resolution master file per item, then export platform-specific sizes from that single master rather than re-editing from scratch each time
Better images do measurably more work for conversion than most sellers assume, and a broader ecommerce photography guide) backs that up in more detail than most reseller-specific advice covers.
Keeping AI-Enhanced Photos Honest
AI editing has one hard rule: never let it misrepresent condition, scale, or what’s actually included in the box. A generated lifestyle background is fine. A generated scratch removal on a “gently used” item is not.
If your cover photo uses an AI-generated backdrop or context scene, a simple disclosure line in your listing description covers you: “Cover photo styled with AI-enhanced background; all other photos are unedited and show actual item condition.”
Pro Tip: Keep your original, unedited master photos archived, and always include at least one honest, unaltered detail shot. It’s the cheapest insurance you have against returns and disputes.
Why Consistency Beats Better Gear Every Time
Sellers upgrade cameras looking for better photos, but the actual gap between a mediocre shop and a great one is almost always process, not equipment. A skills-focused breakdown of what separates good photos from great ones makes this point well: deliberate editing choices and repeatable habits beat gear upgrades nearly every time.
That’s exactly where SpareDollar fits. It keeps your listings visually and structurally consistent once you cross-list across marketplaces, so all that careful photo work doesn’t get diluted by a mismatched description on a different platform. Consistency is like flossing: nobody loves the process, but everyone can tell when you skip it.
Let SpareDollar Handle What Happens After the Photos
Great photos get someone to click. What happens next, drafting descriptions, filling in item specifics, posting to five marketplaces without your listings drifting out of sync, is where most sellers lose the time they just saved shooting in batches. SpareDollar picks up right there. Import your listings from eBay, Poshmark, Depop, Mercari, or Shopify for free, and let its AI draft item specifics and pricing suggestions while you keep final approval before anything goes live.
Three things it does well for a photo-heavy workflow like this one:
- Time savings: bulk actions mean you’re not rebuilding the same listing five times across five marketplaces
- Better conversion: accurate, AI-assisted item specifics reduce the back-and-forth buyer questions that stall a sale
- Cross-marketplace consistency: your brand voice and visual style stay intact whether the listing lands on eBay or Shopify
Check out how listings adapt per channel on the marketplaces page, or start a free trial and see how much time a single afternoon of batch shooting and cross-listing actually saves you at SpareDollar.
Sources
- 6 techniques to create great images anywhere - SLR Lounge
- 20 photography skills that make good photos great - QZ
- Photography composition techniques - PetaPixel
- Best Photography Setup For Resellers: Pro Tips & Gear Guide – Neon Vintage
- How To Take Photos For eBay: 7 Must Read Tips To Make More Money – Listing To Freedom
FAQ
What camera settings work best for reselling photos?
Use your phone’s default settings with autofocus locked on the product, natural or soft continuous lighting, and avoid flash, which tends to wash out texture and create harsh shadows.
How long does AI photo editing take per image?
Simple edits like background removal typically take a few seconds, while more complex lifestyle image generation can take up to 30 seconds depending on the tool.
Which AI tools should resellers use for photo editing?
PhotoRoom and remove.bg handle background removal quickly, Adobe Photoshop and Lightroom cover detail work and color correction, and Canva works well for quick composites and templates.
Do I need to disclose AI-generated lifestyle photos?
Yes, a brief disclosure line noting that your cover photo uses an AI-enhanced background protects buyer trust and keeps your listing accurate.
How does SpareDollar fit into a photo-and-AI workflow?
SpareDollar picks up after your photos are edited, drafting item specifics and keeping your listings visually and structurally consistent across every marketplace you cross-list to.